In the Organizations section, you can view, update, delete, and add new organizations.
From the organization list, you can see the Organization ID, Organization Name, Number of Domains, Status, and Creation Date for each organization. Additionally, you can use the “Sort” button on any column to sort the list. Sorting can be done by Organization ID, Organization Name, and Status, either from A to Z, Z to A, or from largest to smallest.

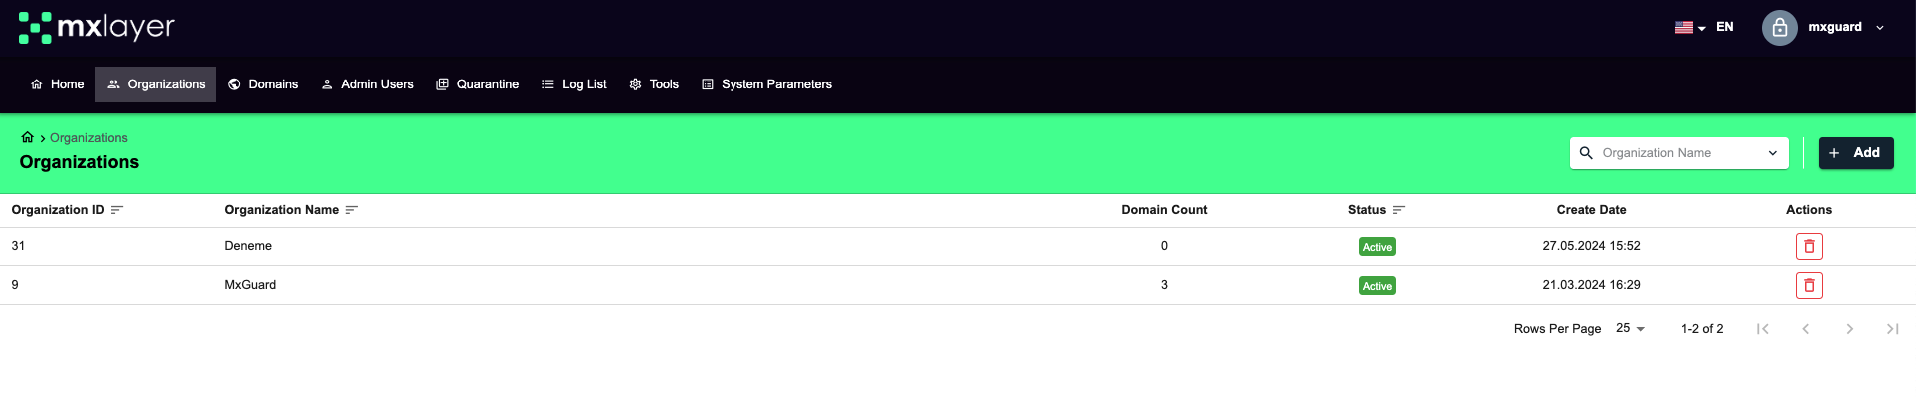
You can easily view the total number of active organizations at the top of the list. Additionally, to determine the number of records shown, you can use the “List Count” section at the bottom of the list.
Adding an Organization
To add an organization, follow these steps. If you fill in only the required fields, the system will use default settings for other features.
- Click on the “Add” button.
- In the opened Organization Information tab:
- Organization Name: Enter the name of the organization you want to add. This information will be used in identification and authorization emails.
- Mobile Phone: Enter the mobile number to be used for informing and verifying the organization.
- Email: Enter the email address to be used for informing and verifying.
- Organization Representative: Enter the name of the authorized person to be used in transactions related to the organization.
- Reference ID: You can use this field to provide a connection to platforms where you can manage your organizations via programs like CRM.
- Phone: Enter the phone number to be used for informing and verifying.
- Status: Select the status of your organization. (Active / Inactive).

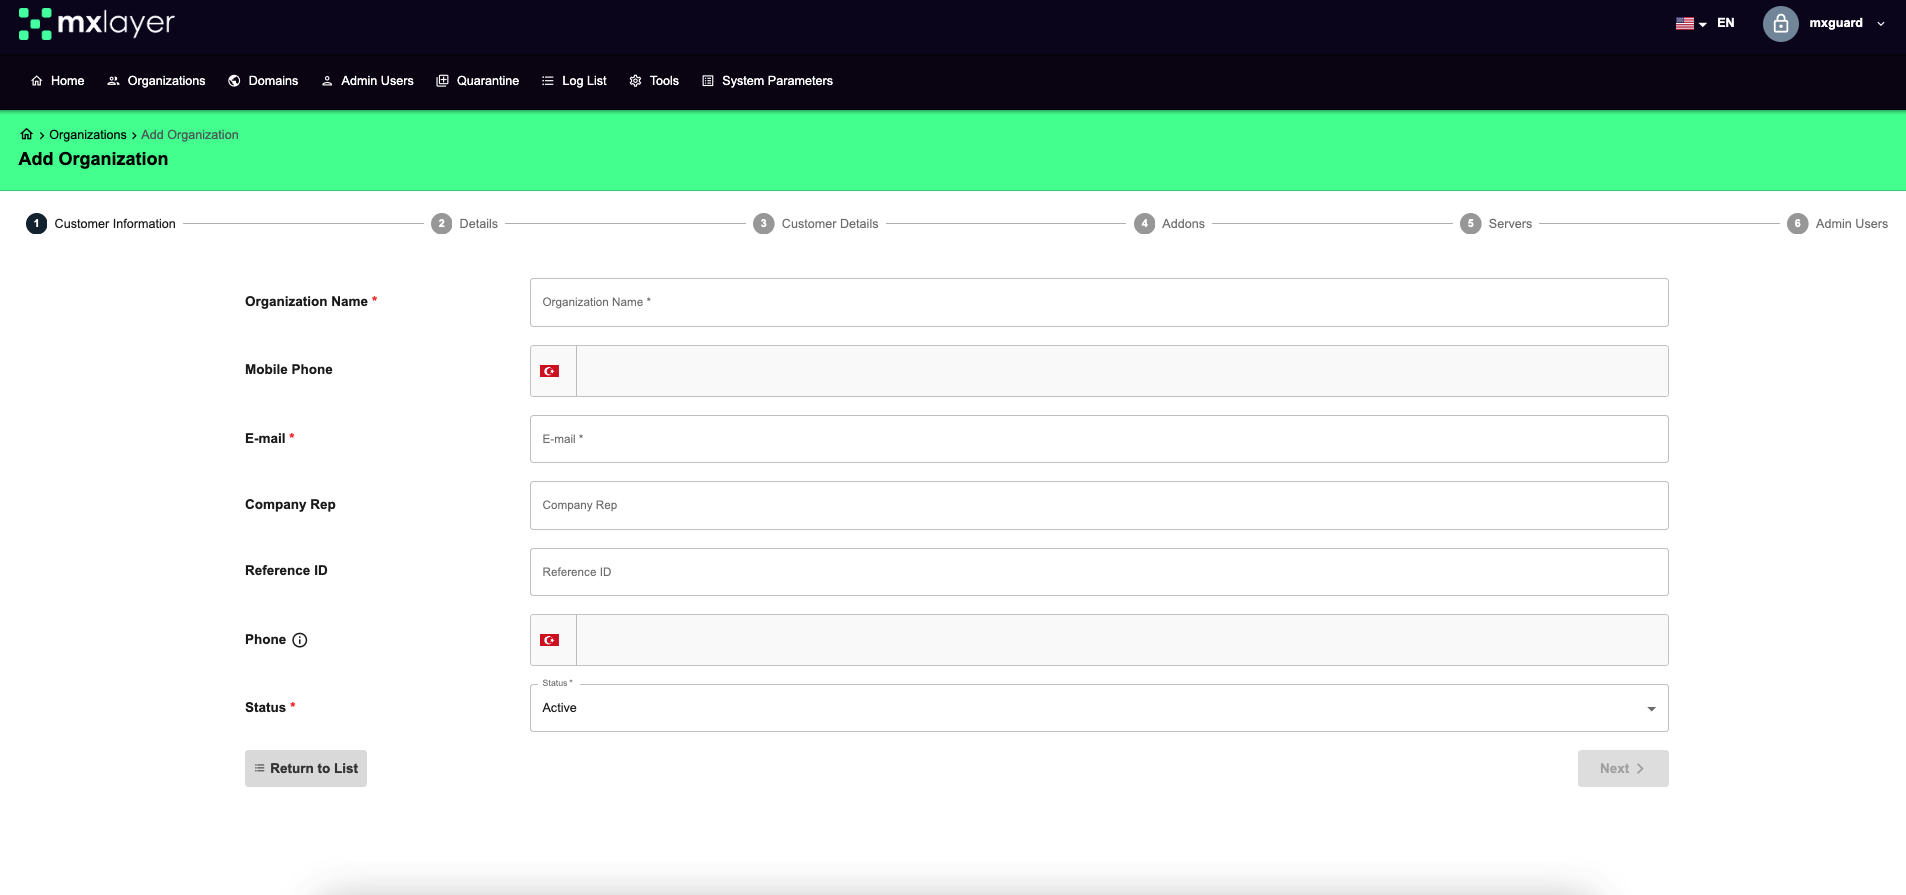
After entering the organization information, click the “Next” button.
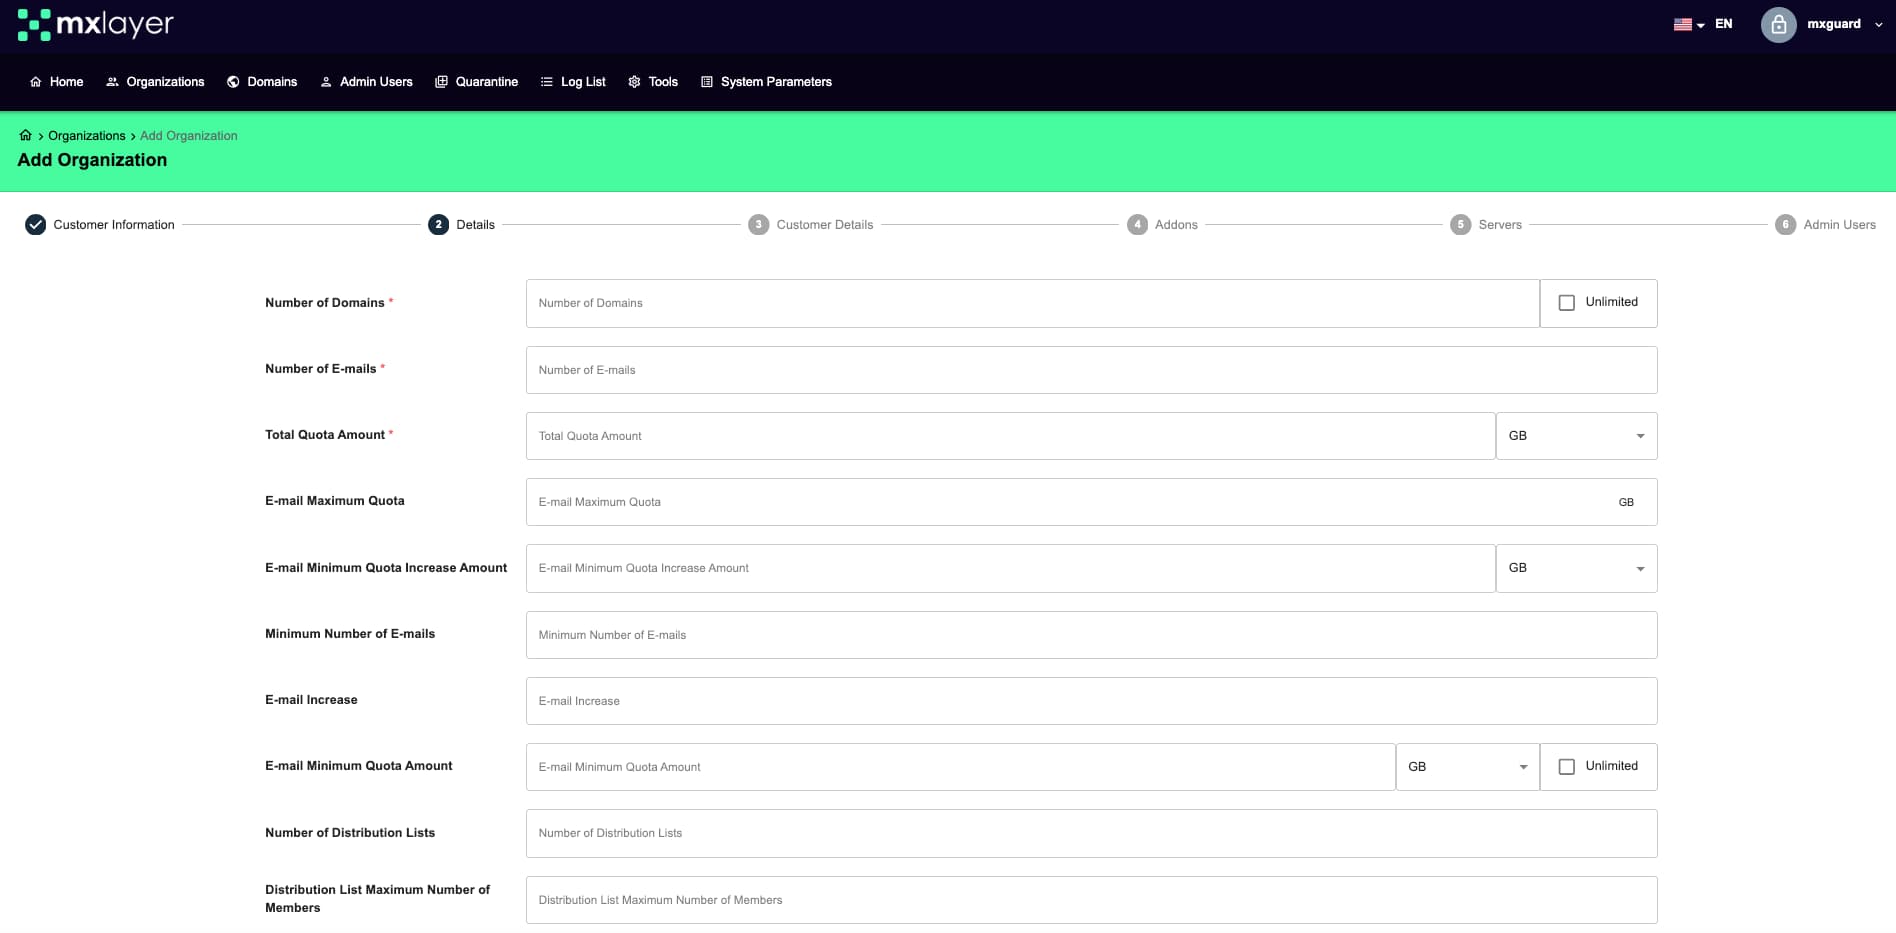
- In the opened Details tab:
- Number of Domains: Specify the number of domains you will assign to the organization.
- Number of Accounts: The total number of accounts specified in the contract section is automatically reflected.
- Account Increase: Determine the number of account increases for the assigned domain.
- Number of Distribution Lists: Specify the total number of distribution lists for the assigned domain.
- Maximum Email Message Size: Define the total size of an email created (sent) by accounts associated with the domain.
- Maximum Number of Recipients per Email: Set the maximum number of recipients for an email created (sent) by accounts associated with the domain.
- Maximum Number of Attachments per Email: Specify the maximum number of attachments that can be included in an email created (sent) by accounts associated with the domain.
- Maximum Individual Attachment Size per Email: Define the size of a single attachment in an email created (sent) by accounts associated with the domain.
- Quarantine Search Days Limit: This area defines the number of days a search can be performed in the quarantine queue for accounts associated with your domain. Emails in the quarantine queue, which contains unwanted (spam), virus-laden content, or specifically filtered emails not sent to the inbox, are held for 7 days. Emails not removed from quarantine within this period are permanently deleted by the system.
- Mailbox Filters: Manage the status of mailbox filters that can be used for active accounts.
- Auto-Clean Folders: You can enable this feature to ensure that the emails contained are automatically deleted after a certain period, or disable it to turn off automatic deletion.

After entering the organization details, click the “Next” button.
- In the opened Organization Options tab:
- DNS Control Requirement: Set to “On” if DNS control is required for the organization.
- Email Dot Insensitivity: Set to “On” if email dot insensitivity is required for the organization. Email Dot Insensitivity removes “.” characters from email accounts.

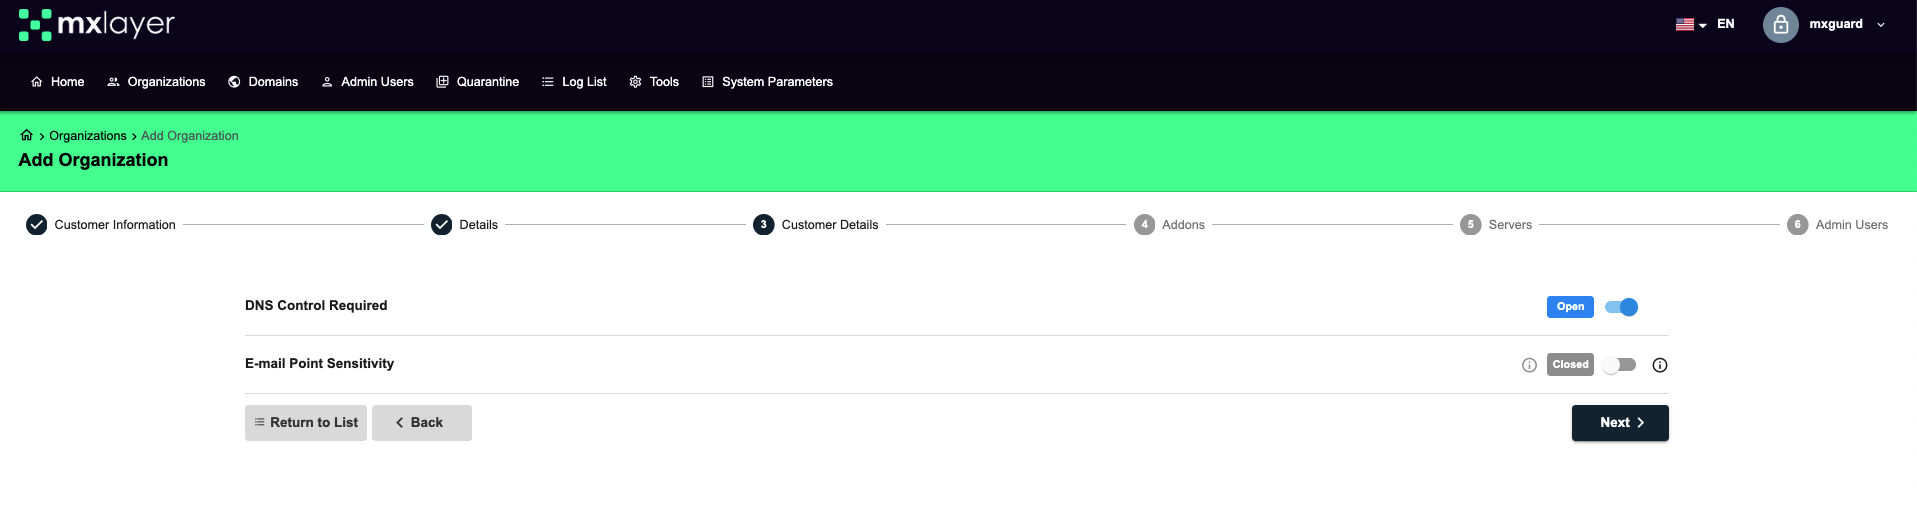
Click the “Next” button to continue.
- In the opened Add-ons tab:
Consult with your sales representative to determine which services and features your organization can use.
Options: Archive, Panel Theme Operations, Message Center Theme Operations, Can Send Bulk Emails.

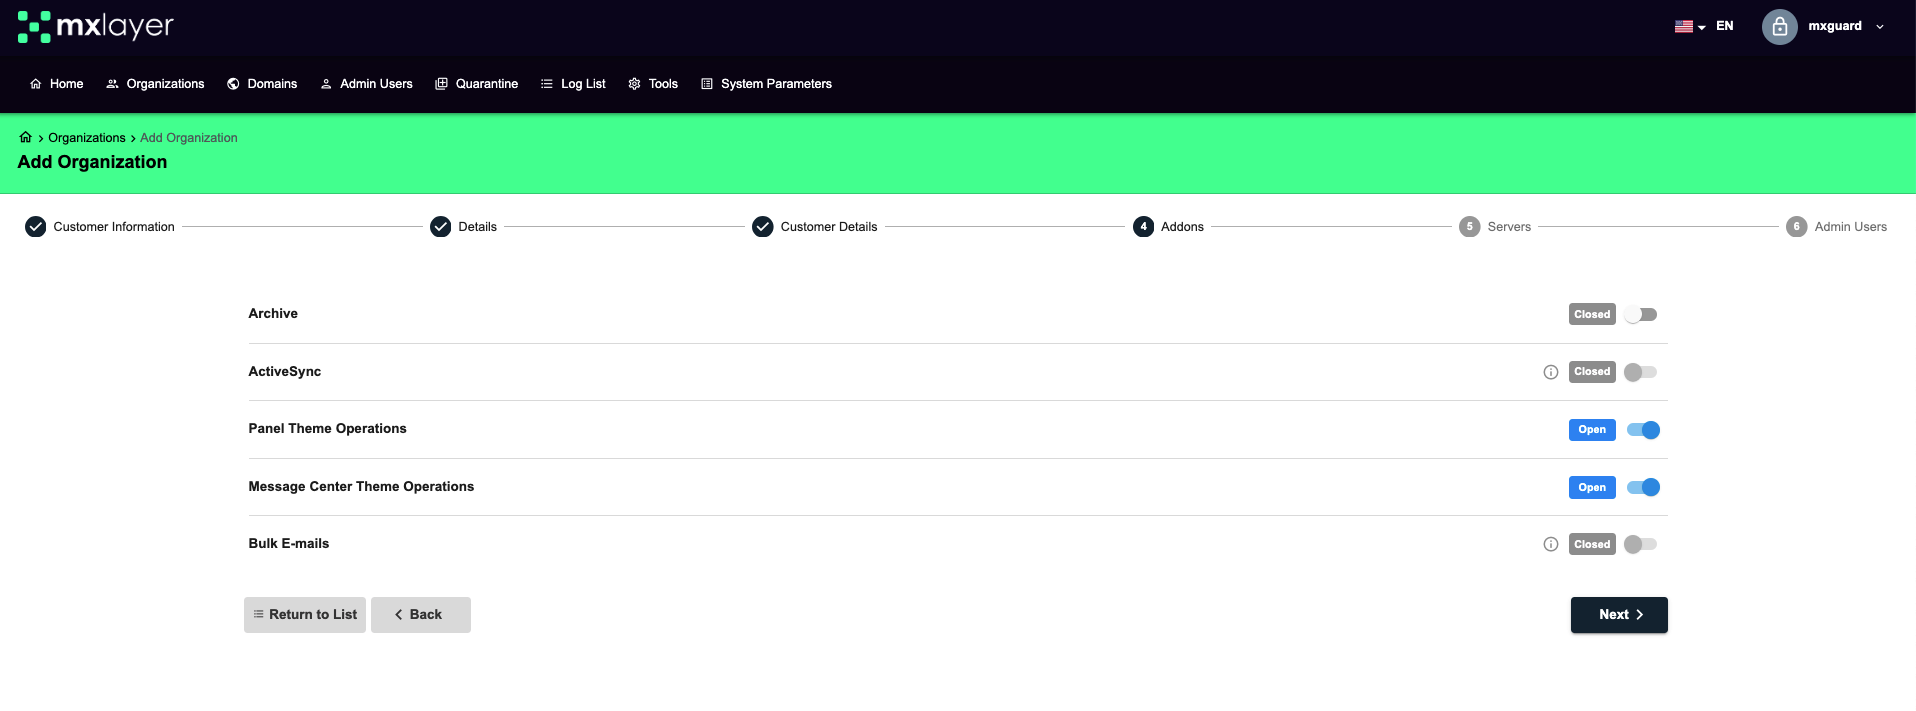
Click the “Next” button to continue with the organization adding steps.
- In the Servers tab (If Servers tab is not visible on your account, you can skip this section):
- Can Use All Servers
- Can Use Specific Servers: You can select from all servers in the system.


- In the Administrators tab, click the “Add Administrator” option to add one or more administrators.
- In the Add Administrator screen, you can add information such as Name-Surname, AdminUsername, Password, ConfirmPassword, Email, and MobilePhone.

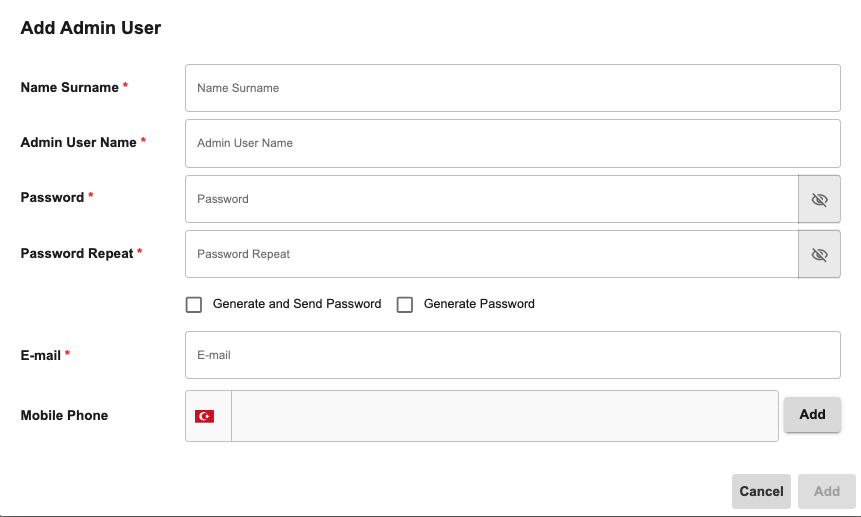
Finally, click the “Finish” button to finalize the organization addition process.
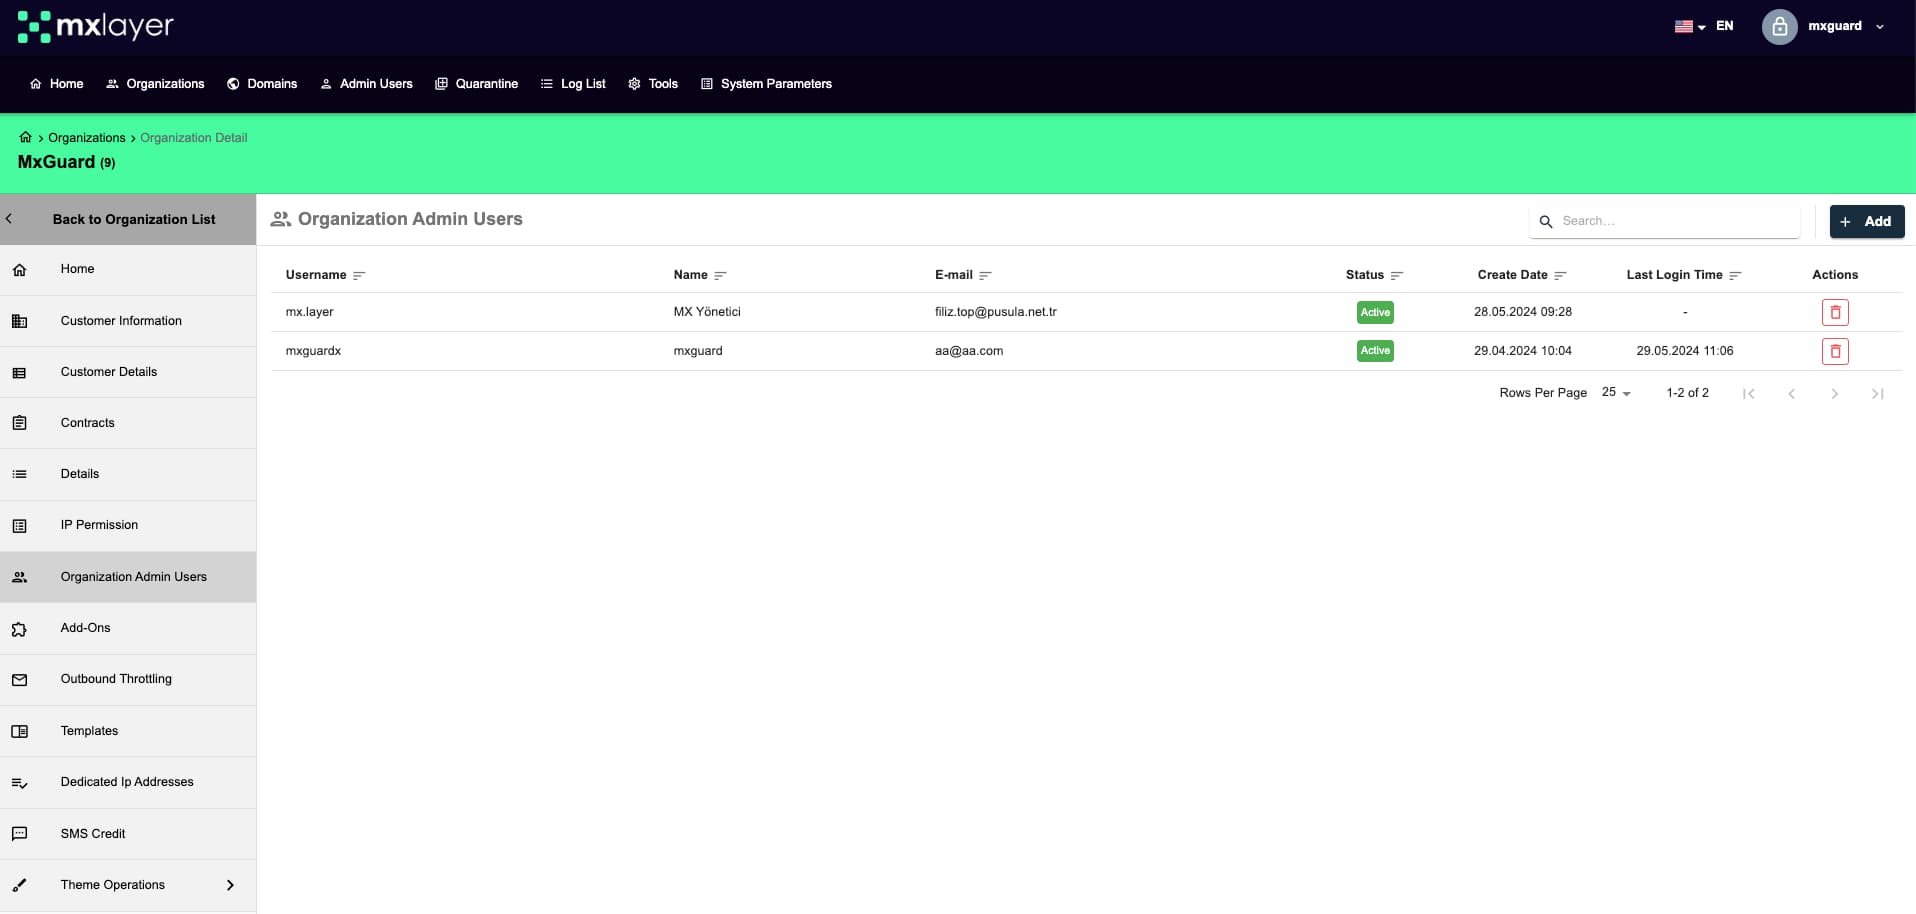
Viewing and Listing Administrators
In the Administrators section, you can view detailed information about the administrators defined in your panel. For each administrator, details such as Username, Name, Email, Status, and Creation Date are displayed. You can use this information to filter and search for administrators. Additionally, you can set the number of items to display in the list and sort them in your desired order.

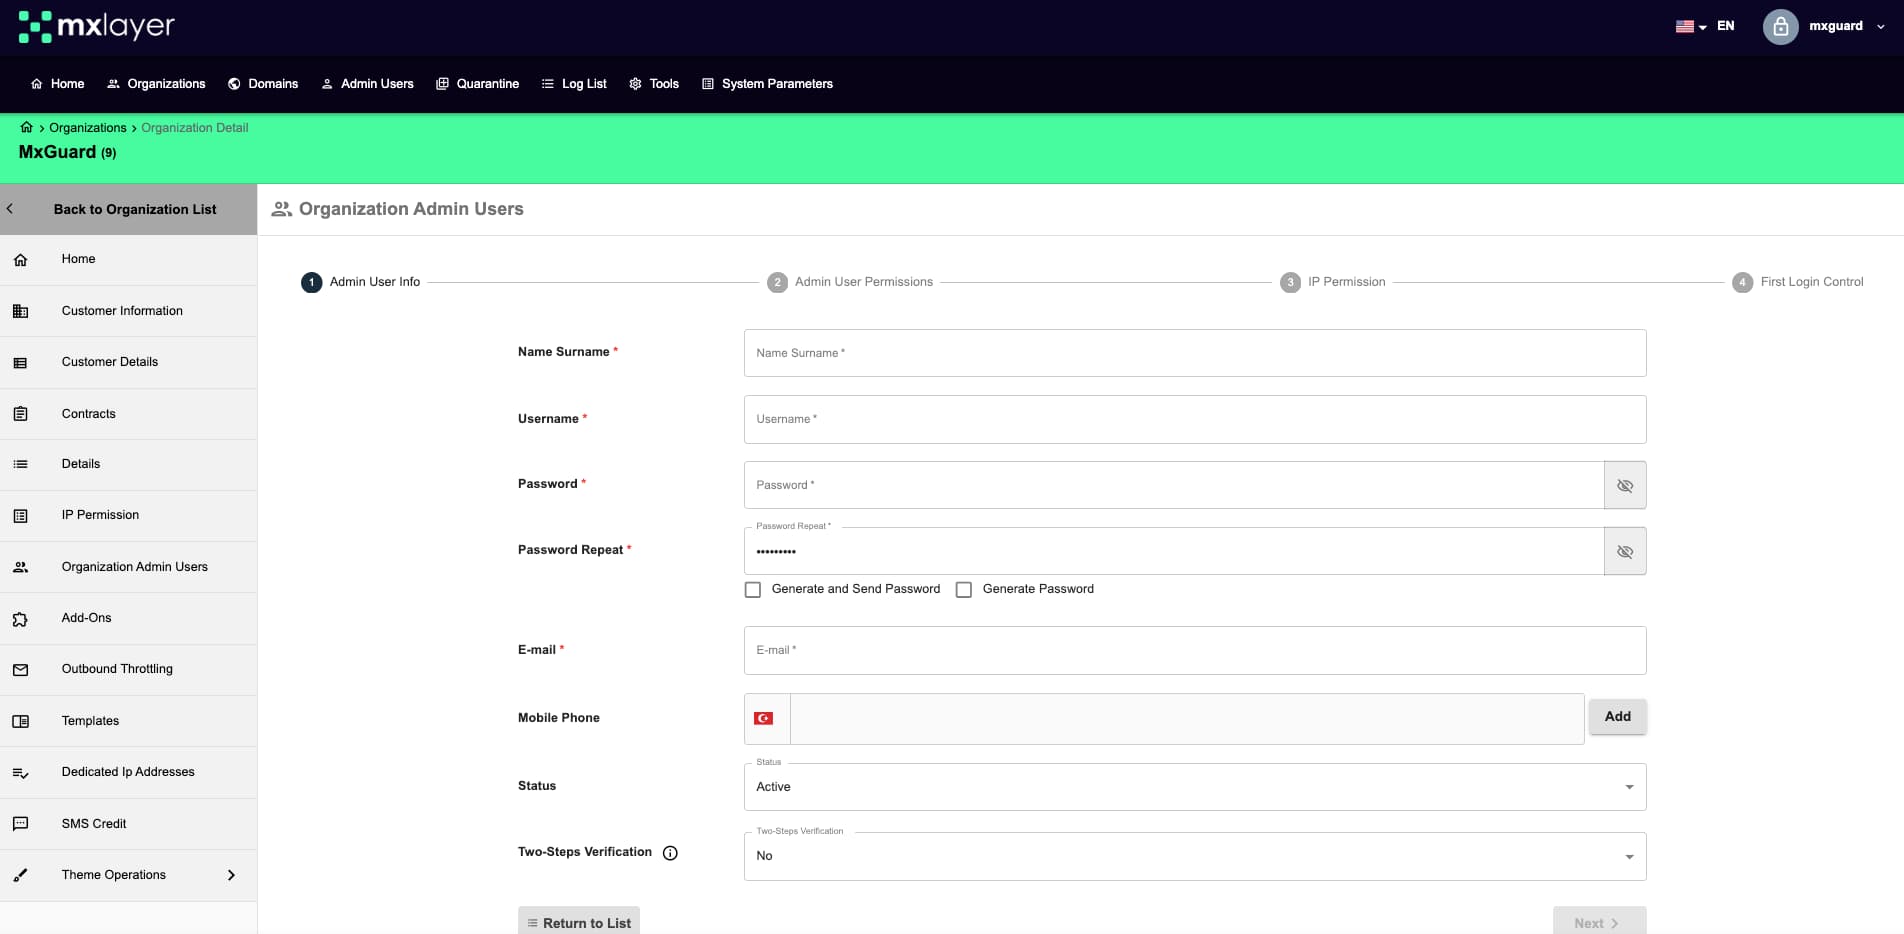
Adding an Administrator
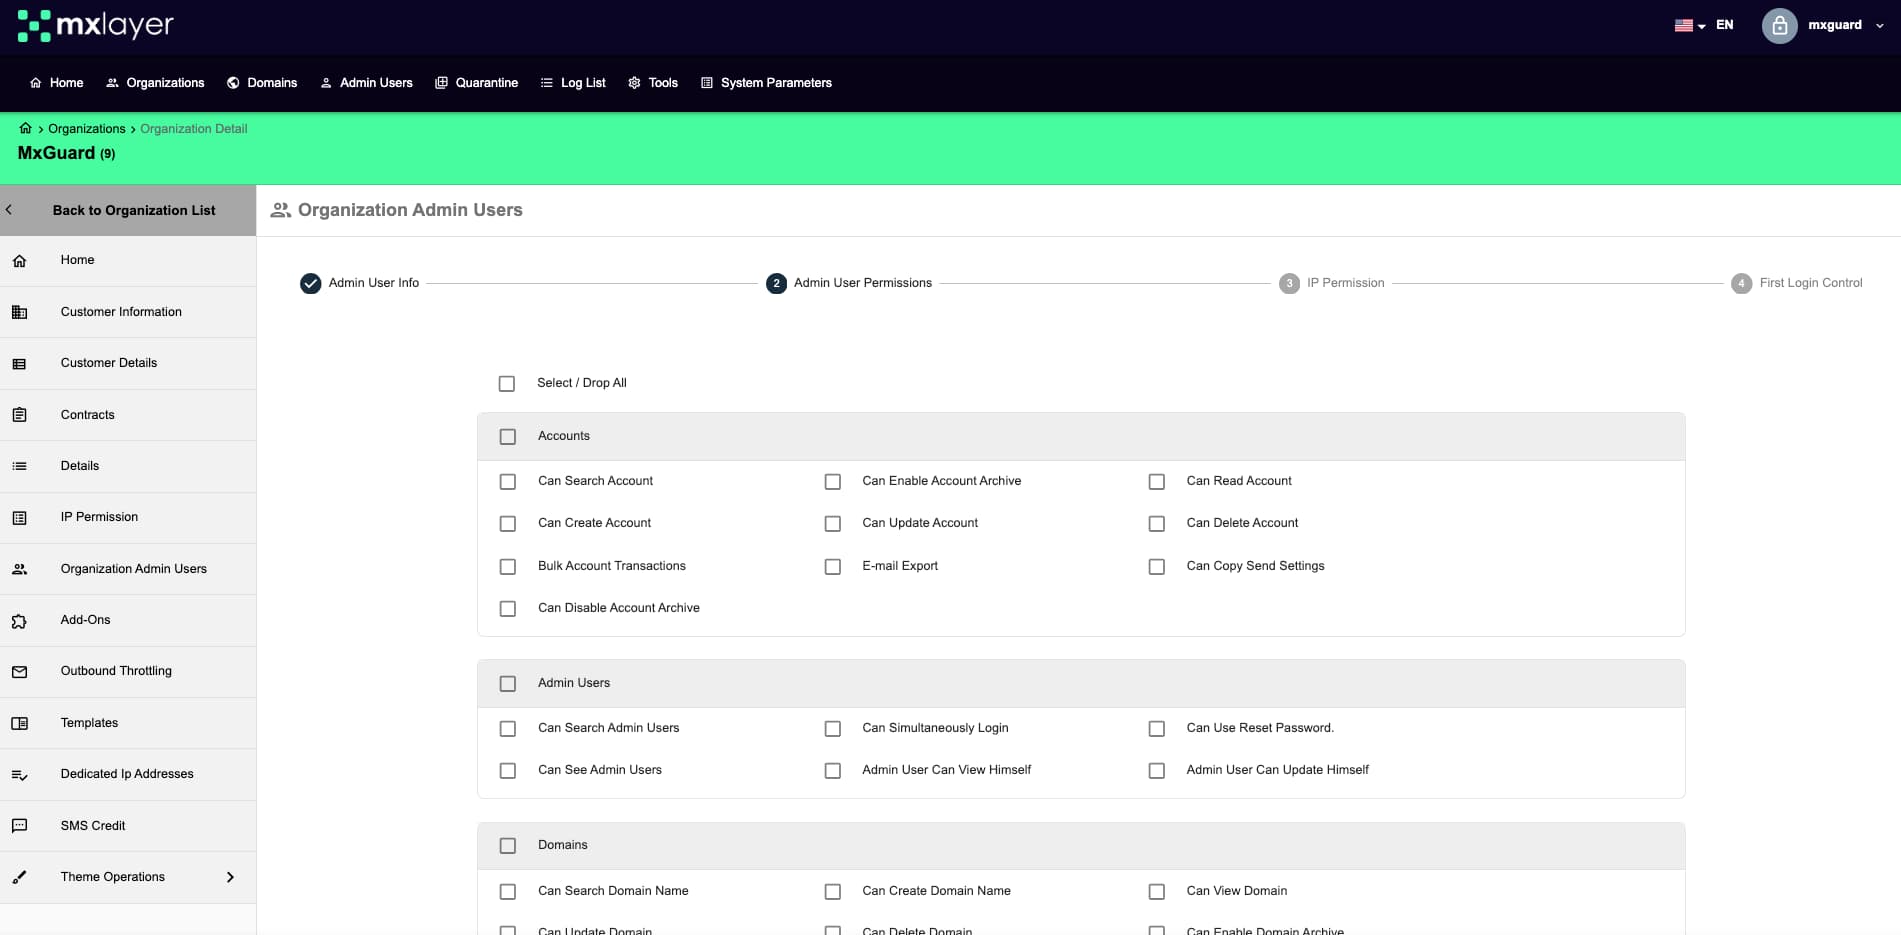
To add a new administrator, click the “Add” button. In the opened screen, you need to enter the basic information of the administrator. You can also set the Status of the administrator, configure Two-Step Verification options, and optionally change Administrator Permissions. Two-Step Verification is an option that enhances login security. By adding an IP allowance, you can ensure that the administrator can only log in from specific IP addresses.

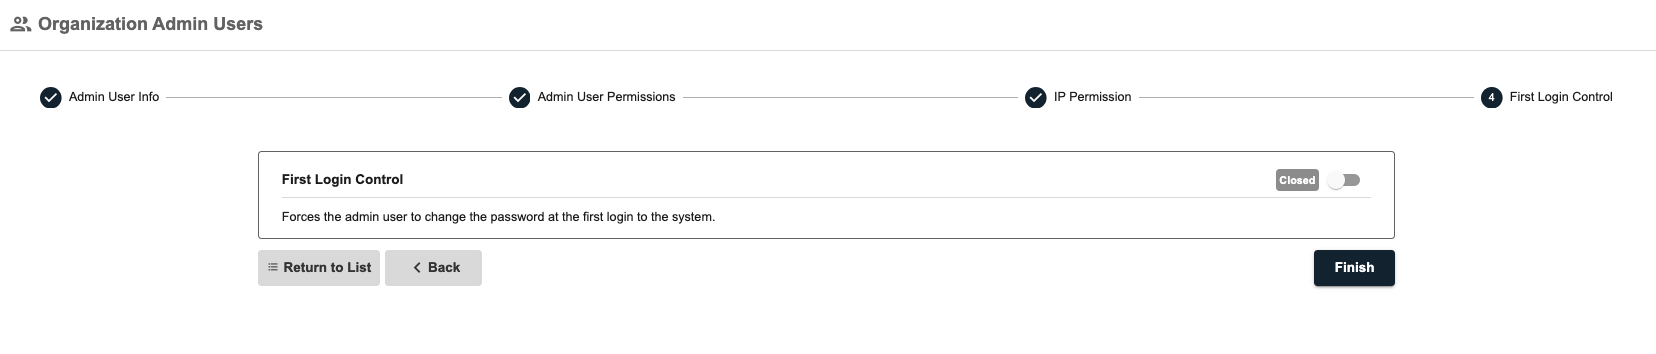
First Login Control
When adding an administrator, you can require the administrator to change their password on their next login in the First Login Control section. This is important for enhancing security measures.

Editing
To edit an existing administrator, click the “Edit” button next to the relevant administrator. In the editing screen that appears, you can modify the administrator’s information, permissions, IP allowance, and other details.

Deleting
To delete an administrator, click the “Delete” button next to the relevant administrator. This action will permanently remove the administrator’s data and access permissions. You will be prompted with a warning to confirm the deletion before it is finalized.